

Here’s another one we run into when taking on new clients from in house or companies with poorly managed IT services. Often times we’ll come into a nice looking domain with two DC’s on server 2016 or 2019, or even 2022! And we’re excited because domain replication and GPO’s are working right? NOPE!!! We have these new DC’s using a deprecated replication method, because there was an in-place OS upgrade or replication was just never upgraded.
Let’s start with what SYSVOL is. SYSVOL is a folder shared by domain controller to hold its logon scripts, group policies and other items related to AD. All the domain controllers in a network will replicate the content of its SYSVOL folder. The default path for a SYSVOL folder is %SystemRoot%\SYSVOL. This folder path can define when you install the active directory.
Windows Server 2003 and 2003 R2 uses File Replication Service (FRS) to replicate SYSVOL folder content to other domain controllers. But Windows server 2008 and later uses Distributed File System (DFS) for the replication. DFS is more efficient than FRS. Since windows server 2003 is way out of support, most people have already completed, or are still looking for, migration to latest versions.
However migrating FSMO roles WILL NOT migrate SYSVOL replication from FRS to DFS. Most of the engineers forget about this step when they migrate from Windows Server 2003 or 2008 to new versions.
To perform the FRS to DFS migration we uses the Dfsrmig.exe utility. More information about this is available here https://technet.microsoft.com/en-au/library/dd641227(v=ws.10).aspx.
Migrating FSMO Roles.
For the demo we’re using Windows Server 2016 server. We’ve already migrated FSMO roles from a Windows Server 2008 R2 server.
In order to proceed with the migration forest function level must set to windows server 2008 or later. So if your organization has not done this yet, the first step is to get the forest and domain function level updated. We recommend using the highest available. For example if you have a 2016 and a 2019 Windows Server, you can upgrade to a 2016 server forest with no issues.
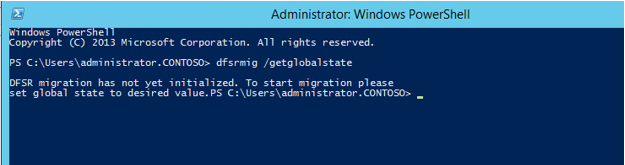
You need to be ridiculously cautious and make sure there there isn’t a migration already going on that has been forgotten about. You can verify if the system uses the FRS using dfsrmig /getglobalstate. Here’s what we’re doing:
- Log in to domain controller as Domain admin or Enterprise Admin.
2. Launch powershell as an admin and type dfsrmig /getglobalstate. This output should tell us no one has initiated DFRS migration yet.
Before we move to the configurations, let’s look at the different stages of the migration. There are four stable states going along with the four migration phases.
State 0 – Start.
With initiating this state, FRS will replicate SYSVOL folder among the domain controllers. It is important to have an up to date copy of SYSVOL before the migration process begins to avoid any conflicts.
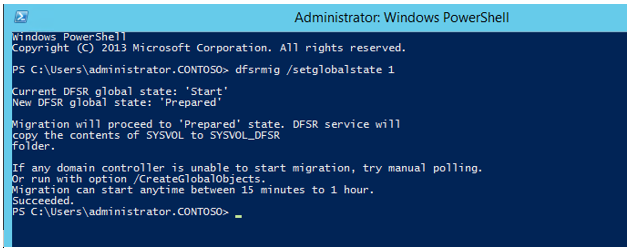
State 1 – Prepared.
In this state while FRS continues replicating SYSVOL folder, DFSR will replicate a copy of SYSVOL folder. It will be located in %SystemRoot%\SYSVOL_DFRS by default. But this SYSVOL will not respond for any other domain controller service requests.
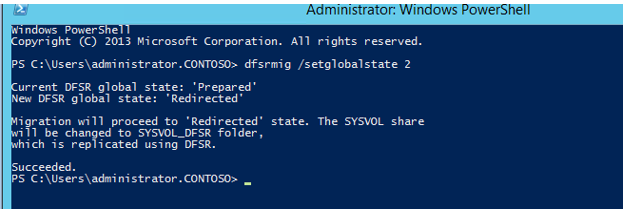
State 2 – Redirected.
In this state the DFSR copy of SYSVOL starts to response for SYSVOL service requests. FRS will continue the replication of its own SYSVOL copy but will not involve with production SYSVOL replication.
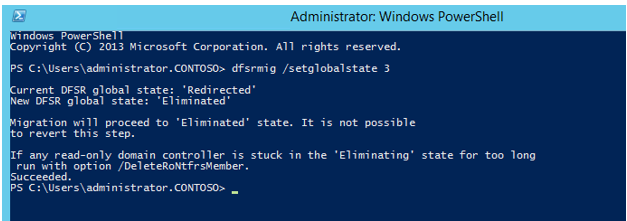
State 3 – Eliminated.
In this state, DFS Replication will continue its replication and servicing SYSVOL requests. Windows will delete original SYSVOL folder users by FRS replication and stop the FRS replication. In order to migrate from FRS to DFSR its must to go from State 1 to State 3.
Let’s look in to the migration steps. Note, if you discover there is a half completed migration, you can start where the last person left off.
Prepared State
1. Log in to domain controller as Domain admin or Enterprise Admin.
2. Launch powershell console.
3. Type dfsrmig /setglobalstate 1 and press enter.
4. Type dfsrmig /getmigrationstate to confirm all domain controllers have reached prepared state.
Redirected State
1. Log in to domain controller as Domain admin or Enterprise Admin.
2. Launch powershell console.
3. Type dfsrmig /setglobalstate 2 and press enter.
4. Type dfsrmig /getmigrationstate to confirm all domain controllers have reached redirected state.
Eliminated State
1. Log in to domain controller as Domain admin or Enterprise Admin.
2. Launch powershell console.
3. Type dfsrmig /setglobalstate 3 and press enter.
4. Type dfsrmig /getmigrationstate to confirm all domain controllers have reached eliminated state

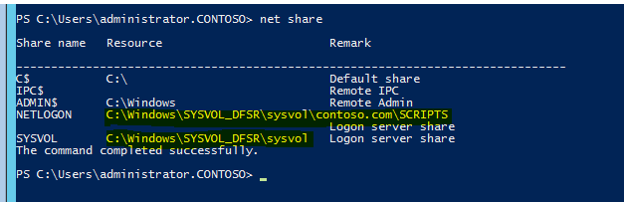
With the migration process complete, go ahead and confirm to confirm the SYSVOL share. Type net share command and enter.
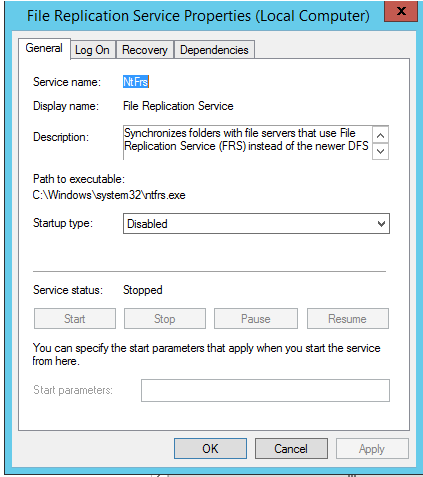
Make sure in each domain controller FRS service is stopped and disabled. This should be automatic. If the services are not disabled, re-check your migration state before manually disabling.
This blog is outlining one of the many ways we can support your business. If you’d like to learn more, check out our basic, co-managed and fully-managed service packages.